Copy and Move your Tests
How to Copy your Tests, Test Suites, and Folders
Section titled “How to Copy your Tests, Test Suites, and Folders”You can copy a single test from a test suite, an entire test suite, or even a folder containing a set of test suites. You can copy these items either within your current project or to a different project.
Copying Tests or Test Suites Within Your Project
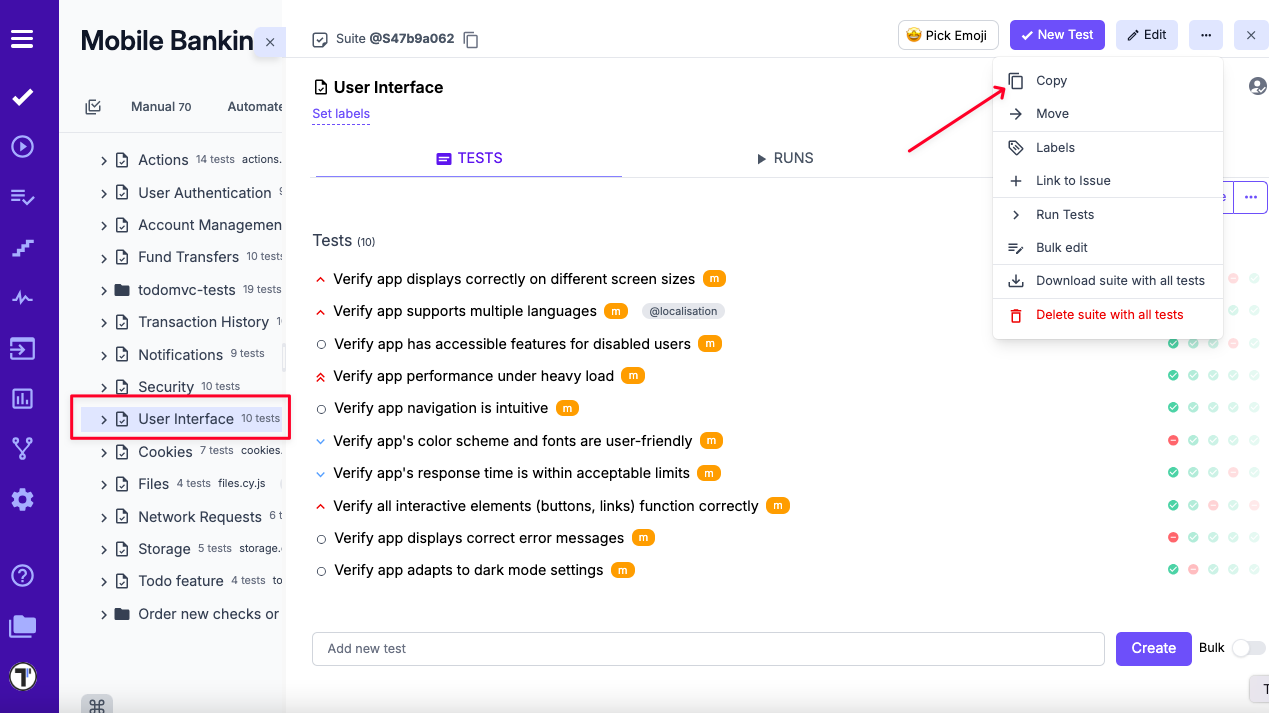
Section titled “Copying Tests or Test Suites Within Your Project”- Go to the Tests page.
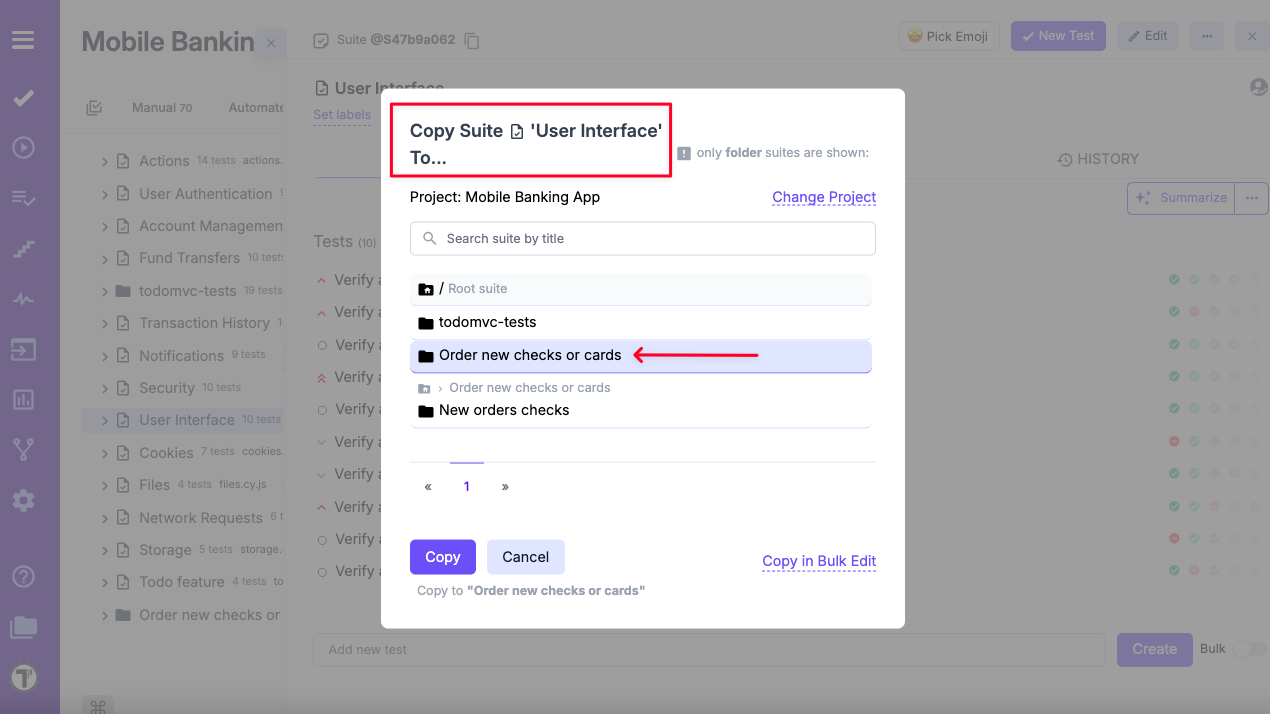
- Select the item you want to copy (e.g., a test suite).
- Open the drop-down menu by clicking the three dots next to the Edit button.
- Click Copy.
- Select the destination folder where you want to move your test suite.
Copying Tests or Test Suites to Another Project
Section titled “Copying Tests or Test Suites to Another Project”- Go to the Tests page.
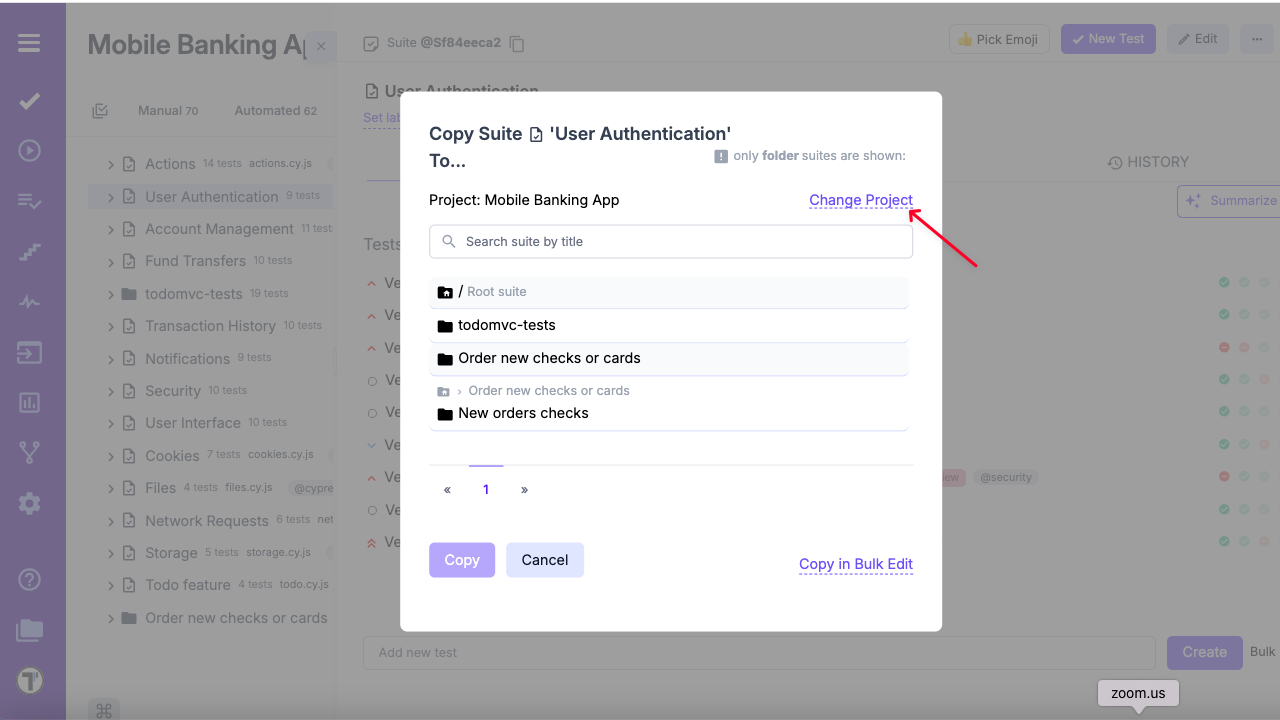
- Select the item you want to copy (e.g., a test suite).
- Open the drop-down menu by clicking the three dots next to the Edit button.
- Click Copy.
- In the pop-up menu, click ‘Change project’.
- Select the specific project from the drop-down list.
- Select the destination folder where you want to move your test suite.
Advanced Copy Options
Section titled “Advanced Copy Options”When copying tests, suites, or folders, you can include additional metadata. To do this, open the Copy modal and expand the More options section.
- Assign labels — copies all labels associated with tests, suites, or folders, including custom labels
- Assign attachments — copies all attached files to tests, suites, or folders
- Assign issues — copies linked issues

You can select one, multiple, or all options at the same time, depending on your needs. If no options are selected, the system creates a copy without labels, issues, or attachments by default.
These advanced options are available for all copy modes:
- Same project
- Other project
- Bulk selection project (for suites and folders)
This flexibility allows you to either fully duplicate test assets with all related context or create a clean copy without additional metadata.
Duplicate Tests
Section titled “Duplicate Tests”The Duplicate feature allows you to quickly create a copy of an existing test inside Testomat.io. It helps QA engineers reuse test structure, steps, and configuration without creating tests from scratch.
When a test is duplicated:
- A new independent test is created in the same suite
- Test content, steps, and parameters are copied
- The new test name automatically includes a Copy badge
During duplication, you can also choose whether to copy additional metadata using Advanced Duplicate Options. This allows you to either create a clean test or a full clone of the original test depending on your workflow.
You can optionally duplicate:
- Labels
- Linked issues
- Attachments
These options help preserve test organization, traceability, and supporting materials when creating similar tests.
How to Duplicate Test
Section titled “How to Duplicate Test”- Navigate to the Tests section
- Open a test you want to duplicate
- Click the (
⋯) actions menu - Click the Duplicate
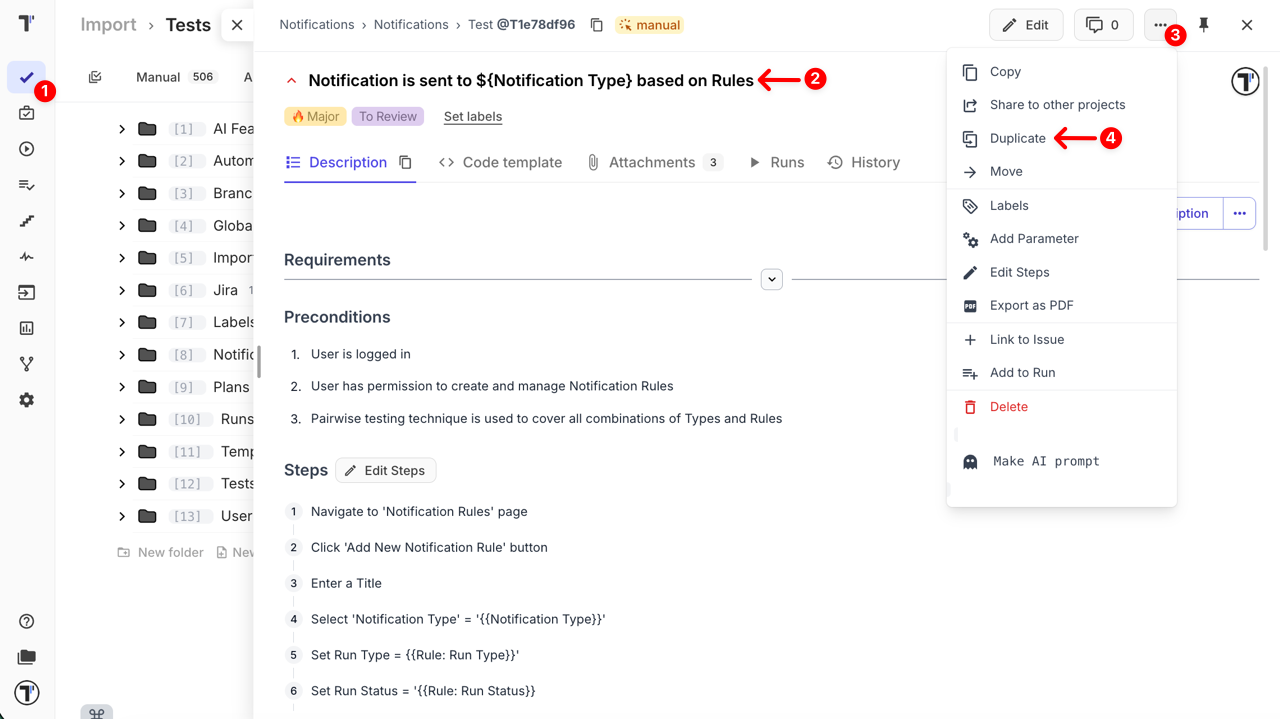
When the Choose duplicate settings modal opens:
- Select advanced duplication options if needed:
- Assign labels
- Assign issues
- Assign attachments
- Click Duplicate button to confirm
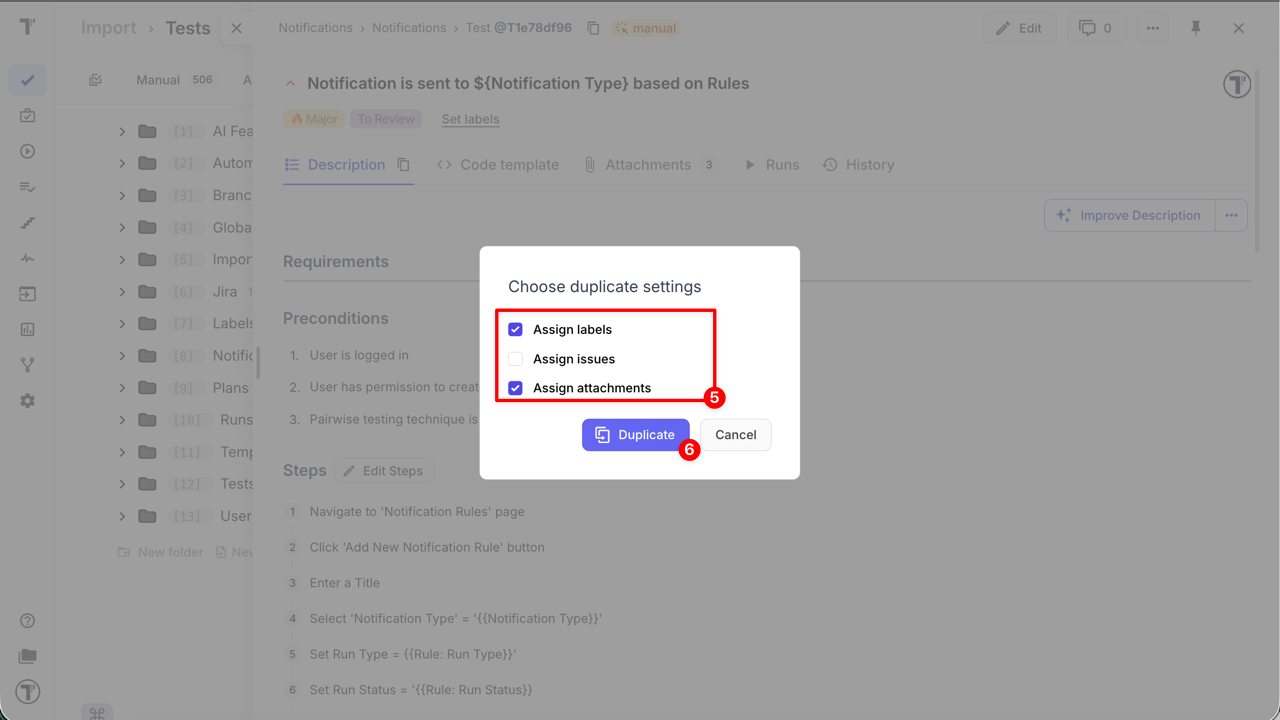
A new test is created immediately with the selected metadata.
Move Your Tests
Section titled “Move Your Tests”You may need to move your tests within a project, for example to another suite. For this purpose, you can use Move or Drag and Drop functionality.
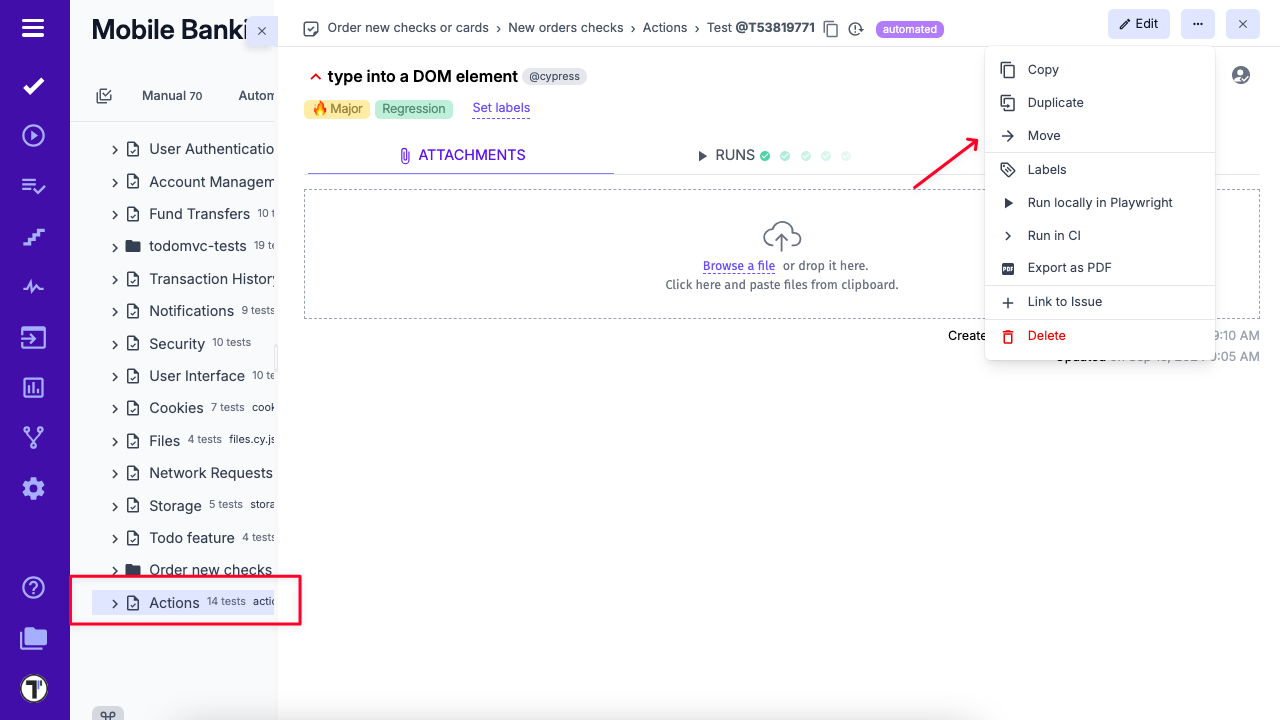
Move menu action
Section titled “Move menu action”- Go to the Tests page.
- Select the item you want to move (e.g. a test suite).
- Open the drop-down menu by clicking the three dots next to the Edit button.
- Click Move.
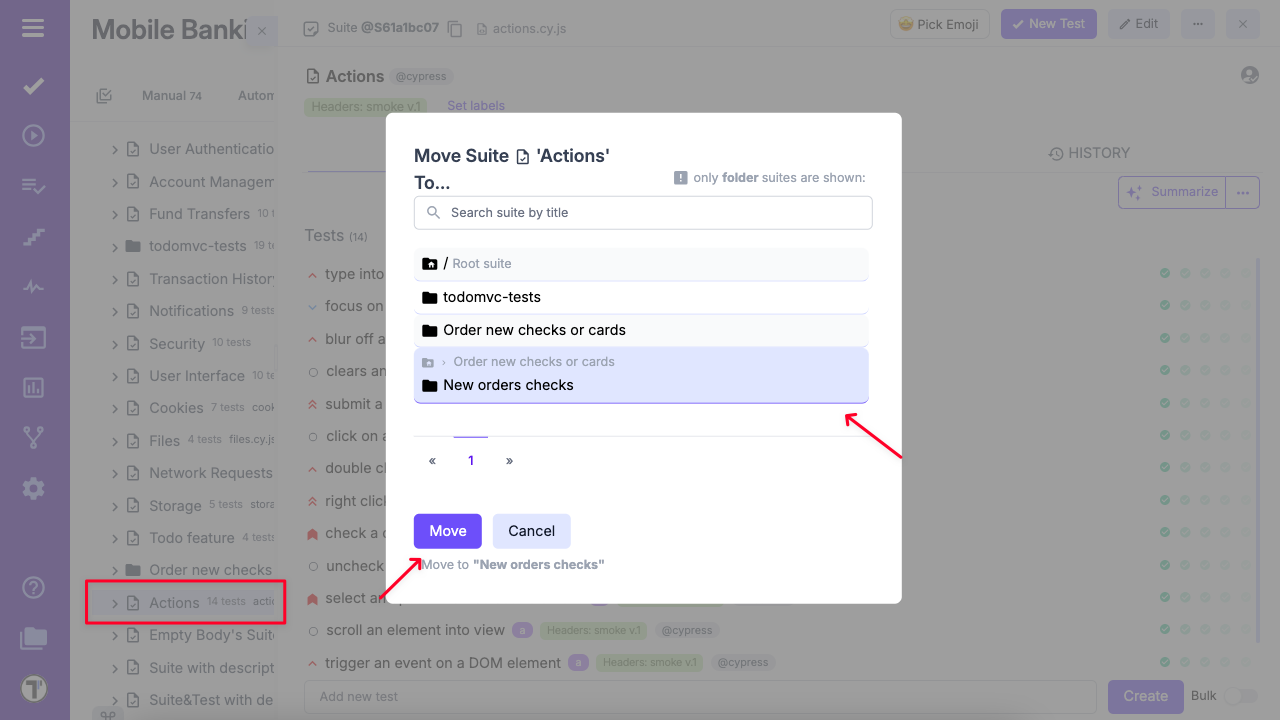
- Select the destination folder where you want to move your tests.
Drag and Drop option
Section titled “Drag and Drop option”- Go to the Tests page.
- Expand the folder or suite where you want to move your test(s).
- Hover over the test, suite, or folder you want to move until the drag handle (⠿) appears.
- Click and hold the drag handle, then drag the item to your desired location.
- Position the item slightly below the item you want it to appear under. When space opens up, release to drop.
How to restore deleted tests?
Section titled “How to restore deleted tests?”The Trash Bin feature is designed to enhance data recovery and user experience by allowing users to easily restore accidentally deleted suites or test cases. Revisions are stored for up to 90 days, ensuring that valuable testing data is not permanently lost and can be quickly recovered without the need for complex restoration processes.
You can also track changes to Suits and Test Cases, including deletions, on the Pulse page.